Free Ruffled Stocking Pattern and Tutorial
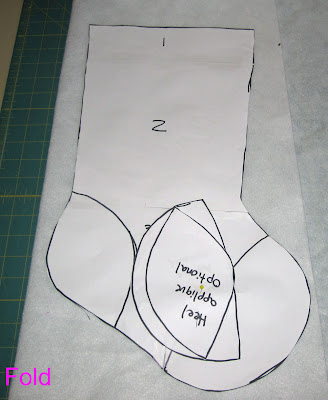
- Download Free CKC Stocking Pattern Here Print in Landscape, make sure Auto Rotate and Center is not checked and page scaling is set to none. Tape together overlapping the letter notches.
- Fabric (Outer and Lining, Applique)
- Fusible Fleece Interfacing
- Scissors or rotary cutter
- Cutting Mat
- Ruler
- Pins
- Iron
Fabric Requirements:
- 3/4 yard of both outer and lining fabrics (Depending on the print you chose, you may be able to lay your pattern the opposite way and use much less)
- 3/4 yard fusible fleece interfacing. We used Pellon 987F.
- 1/8 Yard Ruffle Fabric
- 1/8 Yard Applique (optional) and Loop
Cutting Instructions:
Fold your lining fabric wrong sides together selvage to selvage the width of the pattern. Stack your fabrics one on top of the other, lining up the folds to the right of the pattern. Be sure to check that all layers are flat and there are no wrinkles. Cut around the pattern. You now have 4 stocking pieces.
 |
| I put my main fabric on the bottom and stacked my lining fabric on top. Edge is folded over in the photo only to to show the 2 prints. |
- Cut Out Applique for heel and toe (optional)
- Cut ruffle strips. Fold your fabric in half, wrong sides together, selvage to selvage. Cut one 2" strip of both fabrics making 2 long strips. Trim off the selvage, and then cut your strips in half making a total of 4 strips approximately 2"x21".
- Cut your Loop Piece 6"x3" and the loop interfacing
- Cut stocking interfacing. Fold Interfacing wrong sides together, place pattern on top and cut. You now have 2 pieces of interfacing.
You now have a pile that looks like this, plus your 2 pieces of fleece interfacing.
Construction:
- Iron the interfacing to the wrong side of your outer fabrics.
- Baste the outer edges of the applique on the heel and toe using a 1/8" Seam Allowance.

- Use a decorative stitch around the inside of the applique, or, if you like, apply ric rac over the raw edge and sew.
- Starting at the top of the front side of the stocking, measure down 1" and mark across the stocking. Repeat every inch (1", 2", 3", 4") Set aside.
- Roll hem your 4 ruffle pieces on the bottom edge. If you do not have a serger, please make your ruffles 2.5" instead of 2" and turn under 1/4", and again 1/4" and hem.
- Run a gathering stitch across the top of all 4 ruffle pieces using a 1/8" seam allowance. A gathering stitch is usually your longest stitch length. Do not backstitch the beginning or end. Gather your ruffle to 9" by pulling on the bottom two threads and gently pushing the fabric towards the center.
- When it is gathered to 9" place the ruffle right side down on top of the stocking with the roll hem towards the top of the stocking and the gathering stitch directly on the first line you marked on your stocking. Pin and sew in place using your presser foot as a guide.
- Repeat with the remaining 3 ruffles.
- Starting with the bottom ruffle, iron down so the right side of the fabric is facing up and stopstitch using a 1/8" seam allowance. Repeat with remaining ruffles.
- Flip your stocking front over and baste the sides at 1/8" seam allowance to keep the edges of the ruffles from curling up.
- Using a straight edge, trim off any excess.
- Pin your outer stocking and your lining right sides together and sew or serge around the edges.Then turn the outer stocking right sides out and push all the seams out so you have nice curves. Leave the lining inside out. Set aside.
- Take your loop piece and iron on the interfacing. Then fold it in half right sides together so you have a piece that is 1.5" x 6". Sew down the length using your presser foot as a guide. Turn your loop right side out, press, and topstitch using a 1/8" seam allowance. Fold in half to form a loop, sew the ends together if you like.
- Get your stocking pieces. Take your lining piece and turn the top edge down 1/2" so that the right side of the fabric is turned down towards the outside (Wrong side of the fabric).
- Take your outer piece and turn the top down 1/2" towards the inside of the stocking and press.
- Insert the lining into the stocking and line up the side seams and the top pressed edges.
- Insert the loop between the layers at the side seam on the heel side. Pin in place and pin all the way around the top of the stocking making sure to match up the edges.
- Starting just before the loop, sew all the way around the stocking using a 1/8" seam allowance. When you reach the loop again, go over the loop portion one more time, then backstitch across a final time for added strength.
***********************************************
spring Printables
Billie C.


No comments:
Post a Comment